
Building a Website with Raz
Setting up a website from scratch, with a domain, a server and a service.
TL;DR
In this guide, we built and deployed a blog website using Go "and put it on the Internet".
We covered setting up a server on Digital Ocean, buying, configuring a domain from Namecheap, and managing DNS settings.
Digital Ocean was chosen for its simplicity and cost-effectiveness for hobby projects. We then detailed the deployment
process, including building the Go application, copying files to the server, and creating a systemd service to manage
the blog. This approach ensures the service runs in the background and restarts on failure.
Finally, we discussed alternatives like Docker and terminal multiplexers for running the service, offering flexibility depending on the user's preferences and requirements.
Background
Fifteen years ago when I was in university VMs where all the rage and docker were still some years our. If you wanted to put something on the web, there were basically two options. You could use a shared hosting service for a PHP website, like one.com, or you could rent a VM from a hosting provider and run it yourself.
Today I see some of my colleges coming out from university and get right into working on a very high abstraction, docker, kubernetes, serverless, react etc. This is not necessarily a bad thing, but it is easy to miss out on how things actually work where the abstractions "protects" you from having to think about the network, the vms the server and so on.
To be fair, I think many of my fellow students, back in the days, had no understanding of how servers and the actual web worked. But the layers between your code and HTML files being delivered to a browser have increased a lot since then, with services as Netlify, Vercel, Lambdas, Cloud Run, Cloudflare, Google Cloud, React, Webpack, Docker, K8s and so on.
The other day I overheard a question being asked from a dev, "How do I create a website and how do I get it online?" Mind you, this is a person who has been working with web development, is very competent and gets around very well in or stack.
The Plan
Let us build a blog website to display this blog post detailing how to write a blog service and put it online.
The App
Alright, such lets not fall in to the trap of having our domain collect dust in the corner. Let's build a website.
I won't do through the entire build here. Instead, I'll link to the repo, github.com/crholm/raz.sh where you can find the code (small and simple) and the instructions on how to build and run it.
There are, however, a few things I want to go through here, the basic idea, the architecture and things that might not be so obvious if you are usually working high up the abstraction.
The Idea
The service shall read markdown files from a directory and render HTML pages from them as blog posts
This is nothing new or novel in any way about this project, instead this is quite common for people to write your own blogging tool (or at least it was when blogging was hipped back in the days).
Architecture (or lack there of)
We want this to be as close to the metal as we can, or at least give that feeling. So we will try to bundle everything into one binary and use no extra stuff such as docker, nginx cloud, fly.io or whatever.
The checklist
- Directory with Markdown files
- HTML templates and some CSS
- A Go Web server using HTTPS/TLS and Let's Encrypt
A note here in regard to the Web, it is very much a special place when it comes to programming. To deliver a website / webapp, you can use anything. You can write things in whatever language you want, and your application is treated no different from any other on the web.
This is not the case for most other platforms. Imagine trying to write an iOS app in C#, Visual Basic or Kotlin. Imagine writing an Android app in Objective-C. Imagine writing a Windows app in Bash. But all of these languages can put stuff on the web, and no one else treats your service any different.
The Server
To put things on the internet, the old school way, we need a server. This can be a Raspberry PI in your sock drawer, but the more pragmatic way would be to rent a Virtual Machine (VM) in the cloud.
But you said we should be on the metal!?
Yes, yes, I know. But a VM quite close to a real machine in terms of what we are doing, and much more budget friendly than buying or renting a physical machine.
There are many vendors out there where you can rend a VM by the minute. Some of the big ones are AWS, Google Cloud, Azure, Digital Ocean and Linode. The big three cloud vendors (aws, google and azure) do all of it. But their focus is not specifically VM. So if we just need a VM or two, we are much better off with Digital Ocean or Linode, in my opinion.
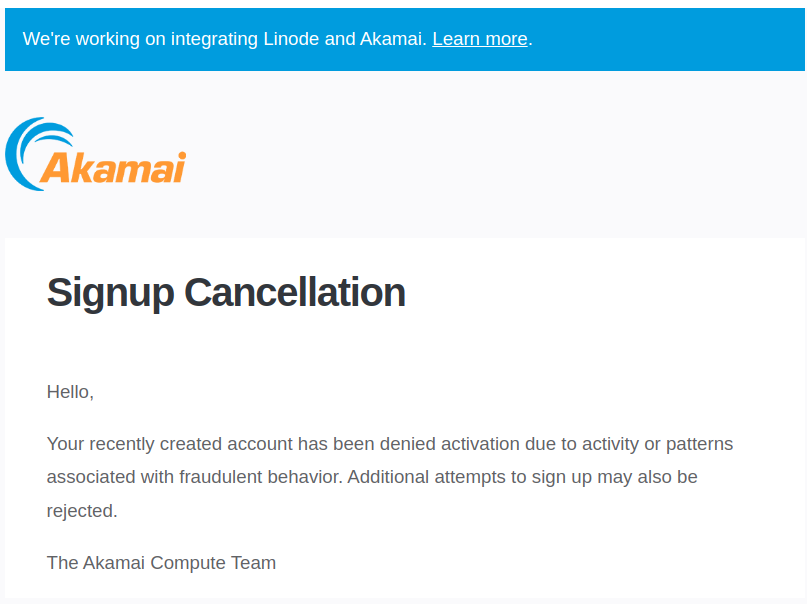
I'm going for Linode for this project. (Which somehow seems to have been bought by Akamai since the last time I looked at it, and the signup experience has turned terrible)

for $5 a month, I get enough power to run this blog.
Ok scratch that, the linode signup experience has gone to complete shit. I don't want to wait for my "account to be reviewed"... Apparently my money smells
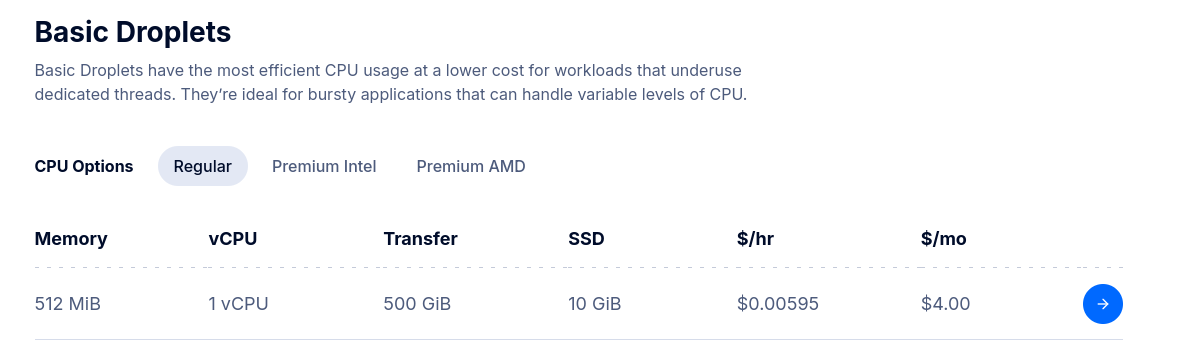
We are going with Digital Ocean, and they seem even cheaper (less ram, but who needs ram :)
Creating a VM
Go to Digital Ocean -> Login -> Droplets -> Create
I'll configure the VM as
- Run in Amsterdam
- Run Ubuntu 24.04
- Basic 1 vCPU + 512mb RAM
- Adding my SSH key
cat ~/.ssh/id_ed25519.pub
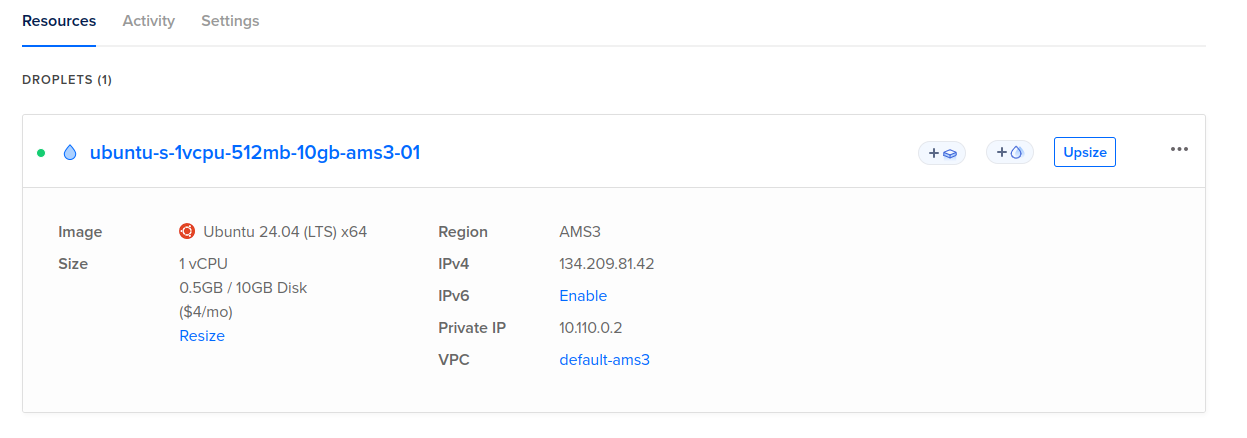
and then click Create Droplet
Accessing the VM
Alright, alright. Now we got a VM and the ip is 134.209.81.42 as seen above. With the ssh key added in the step above.
All I need to do is to SSH on to it
$ ssh root@134.209.81.42
Are you sure you want to continue connecting (yes/no/[fingerprint])? yes
...
root@ubuntu-s-1vcpu-512mb-10gb-ams3-01:~#
The Domain
We need a domain name! Most projects start with an idea and a domain being bought... and they end up never using it or writing no more than a few lines of code. It's a rite of passage for devs and expect 1/2 of the domains you buy to never be used :). (To be fair, I started this project with buying the domain, but the paragraph fits better here)
DNS is the system that translates domain names to IP addresses. The big dog in this space is ICANN who are responsible
for the root zone of the DNS. In turn, ICANN has delegated the responsibility of the top level domains to different
organizations around the world. For example .com is managed by Verisign and .se is managed by IIS. Taking IIS.se as
an example, they do not sell .se domains directly to the public, instead they have registrars that they have given the
right to sell domains.
ICANN -> TLD -> Registrar -> You
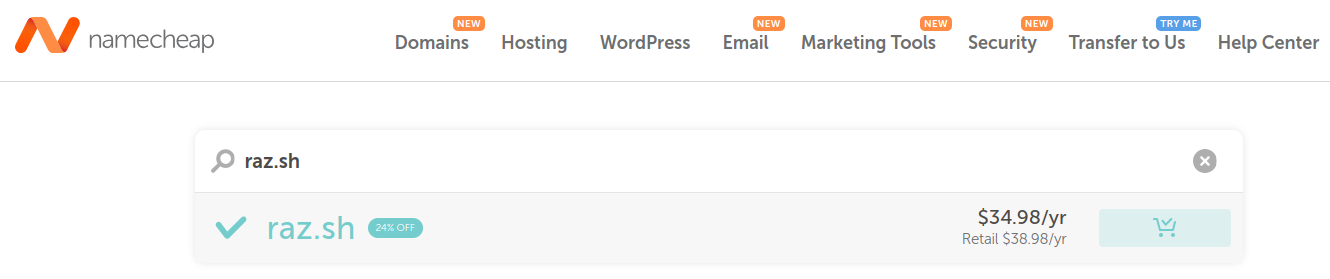
So for our (and most people) purpose, we only really need to deal with the Registrar. Domain names are bought through them, and there are many to choose from. Some prominent, well known once, are Cloudflare, GoDaddy and Namecheap. For this project, I chose the latter, Namecheap integrate towards quite a few TLDs and seems to have a fair pricing.
I went to namecheap.com, searched around for a domain and bought raz.sh. I like short domain
names and this one is perfect for a personal blog.
The DNS
We bought a domain, and it's the registrars role it to have the TLD provider set the Name Service, NS, records for your
domain. This basically points out where the DNS server for your domain is. Who should you ask for the IP of raz.sh in
this case.
We bought our domain from Namecheap they have set the ns records to point to their own DNS server
$ dig ns raz.sh
;; ANSWER SECTION:
raz.sh.                 1714    IN      NS      dns2.registrar-servers.com.
raz.sh.                 1714    IN      NS      dns1.registrar-servers.com.
This mean that I can use the Namecheap DNS server to set the A record for raz.sh to point to the IP of the VM. These
days most registers provide a DNS server for you to use to manage your domain. However, if you are looking to do serious
work, I suggest you "move" the domain to Cloudflare by signing up for an account and pointing the NS records to their
DNS servers. They provide a lot of services for free and are great at what they do.
There used to be a saying "If you are seeing strange behavior on the network, it's probably the DNS." Meaning that a DNS server not working properly will most likely produce very strange artifacts. It is well worth it to use a vendor who has a good DNS service. Most registrars core business is not to be a DNS provider and do not there for have a good DNS service.
Records
Since we are hosting our own server, we want to point the A record to the IP of the VM. This will direct a browser to
the IP of the VM when someone types in raz.sh
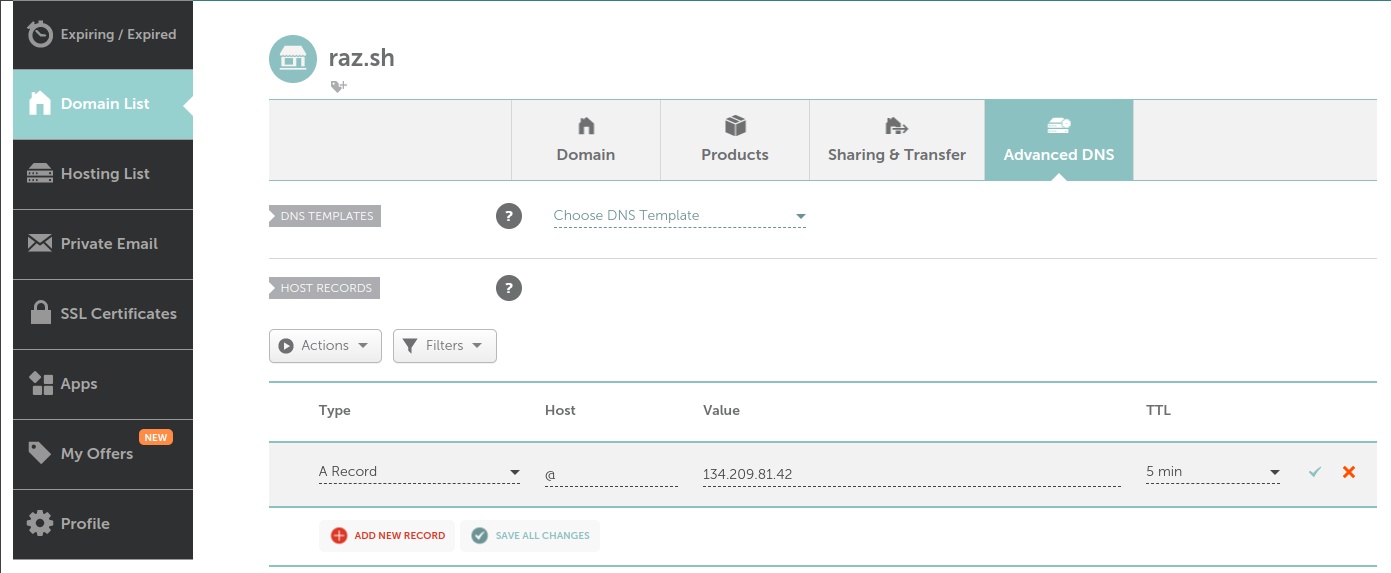
This can seem confusing, the @ sign is a shorthand for the domain name itself. So @ is the same as raz.sh. If I
wanted to use a subdomain, like blog.raz.sh I would write blog in the host field.
The TTL field is Time To Live and simply indicates for a client how long we should cache the DNS responses. E.g.,
below it says 300, meaning 300 seconds or 5 minutes. This is a very low value and is good for testing. In production,
you would want to set this to something like 3600. (DNS is a distributed key-value store, and the TTL is the time a DNS
client will cache the response before asking again).
The TTL can be foot-gun when you start building out your services, since it can take a long time for the changes to propagate. You might be sitting there waiting for the changes to take effect or not being able to fix issues for your users due to changes not propagating fast enough.
All done with the DNS for now
Don't worry if the correct ip does not show up immediately. DNS is a distributed system, and it can take some time for the changes to propagate. You can use the
digcommand to check the status of the DNS records
$ dig A raz.sh
;; ANSWER SECTION:
raz.sh.                 300     IN      A       134.209.81.42
and now we can ssh with the domain name
$ ssh root@raz.sh
...
root@ubuntu-s-1vcpu-512mb-10gb-ams3-01:~#
or ping it
$ ping raz.sh
PING raz.sh (134.209.81.42) 56(84) bytes of data.
64 bytes from 134.209.81.42: icmp_seq=1 ttl=47 time=27.8 ms
...
The Security
Hosting your own server comes with responsibility for the security of the server and the app itself. There are bad actors out there that are constantly scanning the internet for vulnerable servers.
One common vector to gain access to your server is using week passwords for your user in combination allowing login with password from ssh.
Have your service online for a few minutes, and you will se people trying to log in to your server through ssh.
cat /var/log/auth.log | grep "Invalid user"
...
2024-09-26T07:16:41.674101+00:00 ubuntu-s-1vcpu-512mb-10gb-ams3-01 sshd[23590]: Invalid user postgres from 106.250.1.55 port 52758
...
Minimal Security
Good practice is to disable password login and only allow login with ssh keys along with adding something like fail2ban to block ip addresses that are trying to log in with invalid credentials.
$ apt-get install fail2ban
$ systemctl status fail2ban

$ echo "PasswordAuthentication no" >> /etc/ssh/sshd_config
$ systemctl restart ssh.service
The Deployment
Ok, so now we have a software, a server and a domain. Let's put the software on the server and make it available on the domain.
Building the service
The blog service is written in Go, and we will be running things on a Linux VM. So building the app should be a breeze.
$ git clone https://github.com/crholm/raz.sh.git
$ cd raz.sh
$ GOOS=linux GOARCH=amd64 go build razsh.go
$ ls razsh*
razsh  razsh.go
Almost everything we need is now contained in the binary razsh
Copying the binary and content to the server
$ scp ./razsh root@raz.sh:/root
$ scp -r './data' root@raz.sh:/root
Hello world
Now that everything we need is on the server, it's time to start the service.
$ ssh root@raz.sh
root@ubuntu-s-1vcpu-512mb-10gb-ams3-01:~# ls
data  razsh
root@ubuntu-s-1vcpu-512mb-10gb-ams3-01:~# ./razsh serve \
  --data-dir=./data
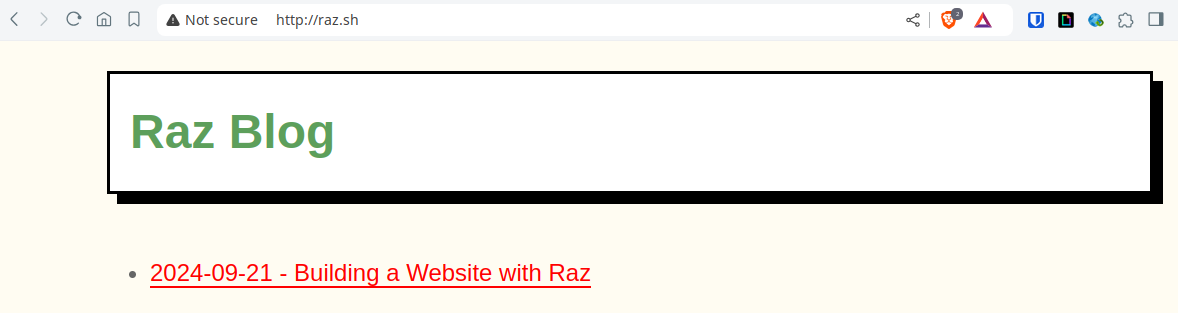
This starts the service on port 80 (unencrypted http) and makes it available on the url http://raz.sh/
TLS
So we want the connections to be secure. This is done through tls. The s in https. This is done by using a certificate. A common way to get a certificate is through Lets Encrypt. They provide free certificates and are straightforward to use. In fact, the razsh binary already has support for this built in to make life easier
root@ubuntu-s-1vcpu-512mb-10gb-ams3-01:~# ./razsh serve \
--data-dir=./data \
--hostname=raz.sh \ ## Domain that the tls certificate should be issue
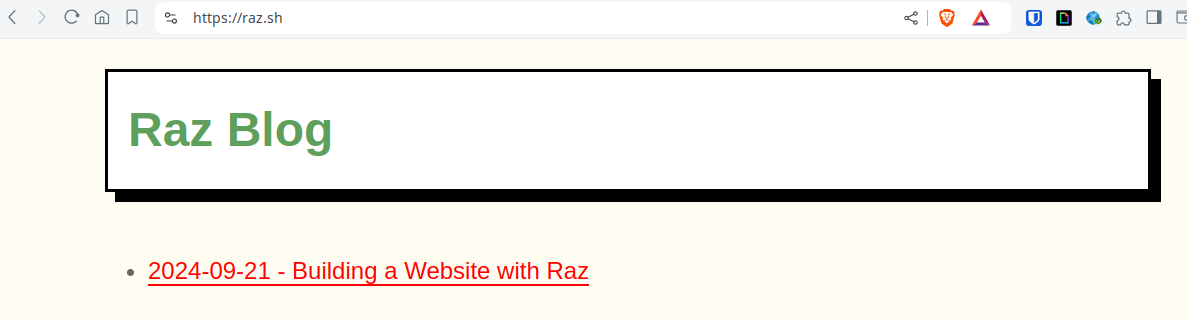
--tls ## Turns on TLS in razsh and starts serving on port 443, https
Now visiting raz.sh should redirect you to https, and it might take a few seconds the first time as the certificate is being issued.
If you are not writing things in Go or want to structure your app a bit more. Putting an ingress proxy in front of your
app, which handles and strips tls, might be a good idea. Some known proxies ones are Nginx, Caddy and Traefik.
These can also handle things like load balancing, caching, rate limiting and so on.
But is it a service?
We have a website running, but is it a service? If we terminate the terminal och press ctrl+c the service will stop. This is not a service. A service is something that runs in the background and is started when the server/vm starts. Back in the days, these were named daemons, and in linux they are still called that sometimes.
A service is simply something that doesn't terminate just because the terminal is closed. It is started and runs in the
background. These days, in a modern Linux dist, this is done through systemd and the cli tools systemctl or
service. e.g. systemctl status docker or service docker status.
Creating a service
A service managed by systemd is not much more than a manifest with some metadata in regard to your binary or script, so let's create a simple one for razsh
$ ssh root@raz.sh
$ echo "[Unit]
Description=raz.sh Blog Service
After=network.target

[Service]
ExecStart=/root/razsh serve --data-dir=/root/data --hostname=raz.sh --tls
Restart=always
User=root
WorkingDirectory=/root

[Install]
WantedBy=multi-user.target" > ./razsh.service
$
$ ln -s /root/razsh.service /etc/systemd/system/razsh.service
$
$ systemctl enable razsh.service
$
$ systemctl start razsh.service
$
$ systemctl status razsh.service
● razsh.service - raz.sh Blog Service
     Loaded: loaded (/etc/systemd/system/razsh.service; enabled; preset: enabled)
     Active: active (running) since Wed 2024-09-25 13:35:32 UTC; 52s ago
   Main PID: 4334 (razsh)
      Tasks: 4 (limit: 509)
     Memory: 2.1M (peak: 2.3M)
        CPU: 14ms
     CGroup: /system.slice/razsh.service
             └─4334 /root/razsh serve --data-dir=/root/data --hostname=raz.sh --tls
What about the pretty logs that I got in my terminal when run from a cli? Now we can access them through journalctl
$ journalctl -u razsh.service
## or, to follow the logs
$ journalctl -u razsh.service -f
## or remotely
$ ssh root@raz.sh journalctl -u razsh.service -f
Deploying
For deploying a new version, we have to stop the service, replace the binary and start the service again.
# Build a new version
$ GOOS=linux GOARCH=amd64 go build razsh.go


# Uploading the binary
$ scp ./razsh root@raz.sh:/root/razsh_new

# Uploading the new css and templates
$ scp -r ./data/assets ./data/tmpl  root@${host}:/root/data

# Stop the service
$ ssh root@raz.sh systemctl stop razsh.service

# Replace the binary
$ ssh root@raz.sh mv /root/razsh_new /root/razsh

# Starting the service
$ ssh root@raz.sh systemctl start razsh.service

# Check the status of the service
$ ssh root@raz.sh systemctl status razsh.service
To publish a new blog entry, we can use rsync to copy the Markdown and media file to the server.
rsync -avz --update --progress "./data/blog" "root@raz.sh:/root/data/"
Alternatives
Docker
There are many ways to put a service on the web. The above is the most basic way to do it. I, my self, like docker, so instead of creating a service in the manner above, I usually end up creating a container and that acts more or less as a service. (This has the added benefit of isolating the process as well.)
This might be something like the following once a container containing the razsh binary is created
$ docker run --detach \
  --name razsh \
  --restart always \
  --publish 80:80 \
  --publish 443:443 \
  --volume /root/data:/data \
  <image_name> serve \
    --data-dir=/data \
    --hostname=raz.sh \
    --tls
We could also utilize docker-compose to make this more structured and easier to manage.
Screen, nohup or tmux
So if you just want something to survive you terminating the connection to the server you can use screen or tmux.
These are terminal multiplexers that allow you to run a terminal session in the background and then reattach to it
later.
$ screen
$ ./razsh serve --data-dir=./data --hostname=raz.sh --tls
Then press ctrl+a and d to detach from the screen session. You can then reattach to the session with screen -r
nohup is another way to run a process in the background. It will run the process in the background.
nohup ./razsh serve --data-dir=./data --hostname=raz.sh --tls &
Conclusion
And there we have it. A running server on the web, hosting a blog for anyone to read. We have gone through the basics of setting up a server, buying a domain, setting up DNS, deploying a service and making it a service.
Edit
Akamai / Linode came back to me
Apparently I was not good enough for Linode post Akamai acquisition and somehow my credit card smells?
https://x.com/c_r_holm/status/1839198234427773332